This is not like most other projects you ever going to read about. This, my friends, is what it's like in the real world. As you know, we started this project with the idea in mind of getting a decent dirt bike for real low bucks. This meant that we had to buy something for incredibly low money and get it running right for just a few dollars more.
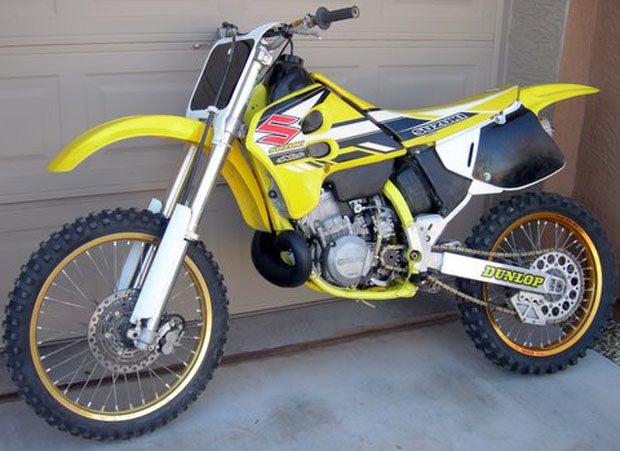
So far, everything has gone according to plan. We got a 1994 Suzuki RM 250 for the unbelievably low price of $100 cash. Of course, the bike didn't have a gas tank with it, there was no piston and various parts of the exhaust valve linkage were missing in action.

This didn't slow us down too much, as we were able to get a gas tank from eBay for $50. For another $88, we were able to get a piston, rings and gasket set. A few dollars more got us the small bits and pieces missing from exhaust valve assembly. We assumed we were on our way to completion of the project.
Wrong.
In the process of hooking everything up, we found all sorts of missing nuts and bolts. Many hours were spent rooting through our toolboxes looking for the right size nuts and bolts for things up like the radiators, side plates, the gas tank and the saddle. You have no idea how much time you can waste just looking for the fastener of the proper size. This is something you had better prepare yourself for when you buy a bike that has been sitting for some time. Things that were supposed to be there were simply not, and more often than not, the previous owner will just shake his head and mumble he doesnt know where that is.
Other Project Lowbucks Stories:

Eventually, the bike was fully assembled and we started to check all the details before trying to fire it up. Problem number one: no spark. This was strange, in that we had seen a spark when we first checked the bike out. After much screwing around, we found out that the spark plug cap was one of the cheapies that came with several models of Suzukis in the late 80s and the mid 90s. After searching around in our various toolboxes, we came up with another plug cap that would do the job. We found the missing spark once again. But a half day was wasted chasing the spark.
Next, our attention was turned to the linkage in the exhaust valve setup. For those unfamiliar with exhaust valves in two-strokes, they evolved with the advent of the YZ power valve. This was nothing more than a way of altering the height on the exhaust port with some sort of mechanism, giving a tremendous amount of flexibility to the average two-stroke. The Yamaha setup seemed to work okay, and in fact lent itself to several modifications that could dramatically change the way the power was delivered.

In the Suzuki, there was a rather complicated setup coming from the bottom end of the bike to the power valve, and after working with it for a while we can tell you that is rather flimsy and poorly made. Several of the small pieces were missing in action and were replaced. Of particular worry is a little small nylon rubbing piece that ties the system together. This is a rather dumb setup that is just looking for trouble. Anyway, we replaced the entire system and then we pretty much had a go.

We then got the stock fuel petcock mounted on the oversize gas tank, using the stock gasket that came with the petcock. As soon as we start filling up the gas tank, gas poured out from all around the petcock mounting area. The base of this aftermarket tank where the petcock was to be mounted was a slightly different shape than the stocker. Luckily, we were able to find an O-ring in our garage that finally sealed the petcock properly and ended the leaking.

We turned our attention once more to putting some gas in the tank. Before we had a gallon of pre-mix poured in, we saw another pool of gas start to spread out on the garage floor. Yep, you guessed it; there was a leak in the gas tank right where the right side air shroud bolted to the tank. There are brass nuts molded into the plastic on the Suzuki gas tank, and apparently the previous owner had been a sort of ham-fisted mechanic and had put way too much pressure on the nut and had literally pulled it away from the plastic. This created a nice leak which filled up half of my shoe with gasoline.

So once again, the fuel tank was drained and we returned our attention to preparing the leak. This was fixed with a combination of epoxy and RTV automotive gasket engine sealer. After that plastic area was cleaned with contact cleaner, we let it dry properly and applied the sealer to it. Another 24 hours later, it seemed cured and we gave it another try. This time, there were no more leaks to be found and we decided to give it a few boots.
Nothing. Not even a halfhearted bark.
There was a ton of compression and the engine kicked through properly, but nothing in the way of the motor trying to run. It was then that we wished we had purchased a proper shop manual. In there, we would have found out how to adjust the exhaust valve setup. As it turned out, a call to Stephen Gautreau at SG CYCLES (Apache Junction, AZ, 602-705-5876) got us on the right track.
It then seemed that all we had to do was get the beast running. Well, at this point, you could hear howling and guttural sounds coming from my garage. Those sounds were me yelling in frustration. You see, the gas tank comes down so low over the cylinder head that getting to the spark plug without removing the gas tank is virtually impossible. This means that checking spark plug will require that you remove the saddle, gas tank and shrouds completely just to get to the spark plug.

It was right there that I pushed the bike back into the garage and went into the kitchen and got a cold beer. In fact, I got several.
Yes, this is the kind of stuff you will run into whenever you take on this sort of project. We hope you appreciate the honesty and you'll apply a bit more patience your project, whatever it may be.
We will get the project completed and running in the final part, that much we will promise you. Sigh.
Other Project Lowbucks Stories:
|
Off-Road.com Newsletter Join our Weekly Newsletter to get the latest off-road news, reviews, events, and alerts! |
Follow @Off-Road
 Your Privacy Choices