Many people are not aware that the KLX110 engine is used in other models of motorcycles throughout the world. Some of those models are actually street legal and therefore must have lights to operate on the road. Lucky for us when Kawasaki decided sell the KLX 110 here in the states they opted to leave some of the street equipment in place. Whether it was for saving money by not altering the production line, or some other reason, what really matters is the 110 is already wired for lighting. Tapping into the bikes power to run a light is fairly straight-forward but one must understand a few things first.
First, the 110 engine does in fact have a lighting coil already on the stator and magnets on the flywheel. What that means is that when the bike is running and the flywheel is rotating around the stator coils Alternating Current (AC) is being generated. This AC current flows through the wiring coming from the stator and into the regulator/rectifier already on the bike. The regulator portion is used to regulate the amount of voltage while the rectifier is used to convert the Alternating Current to Direct current (DC). To avoid going into too much detail in this article just know there is both AC and DC current available on the KLX110, with the DC needing to be run to a battery or capacitor before being utilized. For our light installation however we are only interested the AC portion to power our headlight.
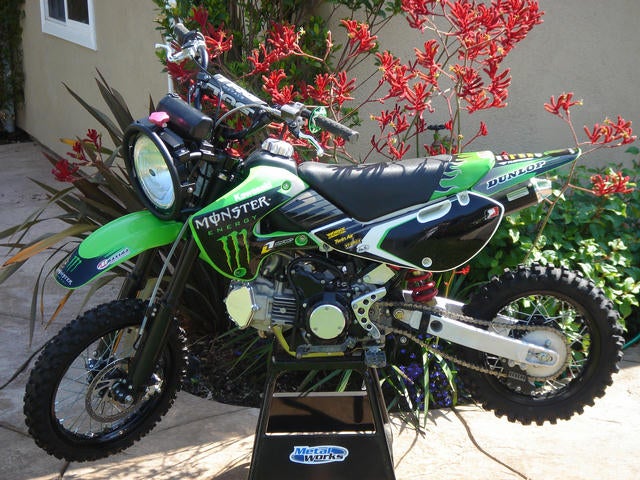
 For night riding around camp and trails on the 110 we opted to install a Trailtech 8” Halogen race light that we picked up used. While not as popular and requiring more power than HID lighting, Halogen lights are generally much cheaper to purchase. In addition the Halogen light gives off a more yellow light with very good fill in lighting around the main beam of light. Many people actually prefer Halogen to HID lights for slower/tighter trail riding because more area surrounding the bike is lit up. This allows for better visibility over rocks and roots over HID lighting with fewer shadows. HIDs on the other hand are often preferred because they require less power to run and offer a more intense direct beam which is good for higher speed riding.
Since our 110 isn’t going to see any high speed desert racing we thought the Halogen would be a great lighting choice. Most of our night riding will consist of play riding around camp and slower speed trail riding. We also know the stator on the 110 puts out enough AC power to run this light, whereas we are still unsure at this point without more testing on how much DC the bike puts out. Our guess it puts out enough DC to feed a small battery and power blinkers and a horn. Finding information on the 110 output is difficult, in fact we read one place on the internet it offers 90 watts total but we are not sure that is true. If so, that could mean approximately 70 watts for AC and 20 for DC, but that would just be a guess. We did locate a wiring diagram in the manual that helped us at least figure out what wire we needed to tap into to get AC current but no further specs were given.
Okay, so head over to Page 2 for step-by-step installation and photos
To begin the installation the seat, tank and shrouds were removed. This gives good access to the regulator/rectifier where we tapped into for power.
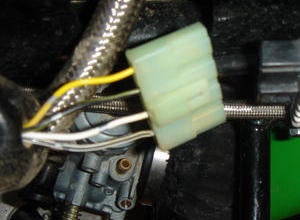
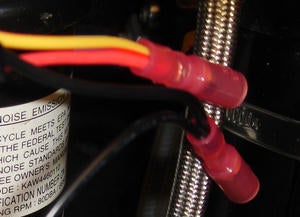
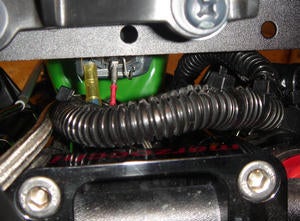
Pulling back the black boot covering the wiring harness going to the regulator/rectifier reveals the different colored wires.
 |
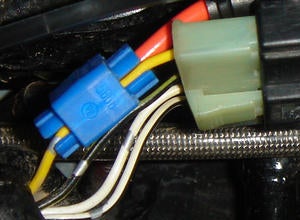 |
| The AC wire we want to tap into is the yellow wire. | We used a splice type connector to tap into the yellow wire without cutting it and ran our line into a mini water-resistant fuse holder. |
 |
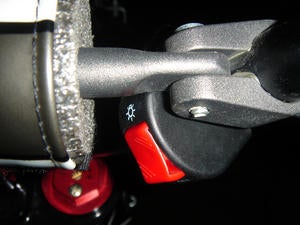 |
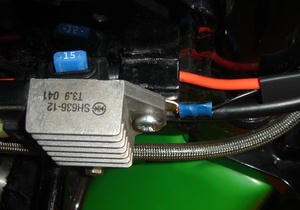
| A 15 amp fuse was installed in the fuse holder to prevent any accidental short from doing damage to the light. | After the fuse we continued the power the line into an On/Off switch also from Trailtech. |
 |
 |
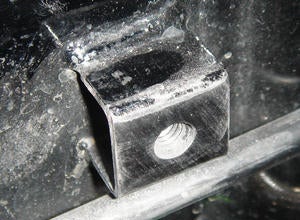
| The other end of the switch needs to be grounded so we removed the regulator/rectifier and sanded down the mount area | At this point we had a power wire and a ground wire both with bullet type connectors so that we could easily add and remove the headlight. |
After sanding away the paint we crimped on a ring terminal and remounted the regulator/rectifier with the screw going through both the regulator/rectifier and the right terminal, also adding a dab of blue loctite to ensure the screw doesn’t back out on the trail.
 |
 |
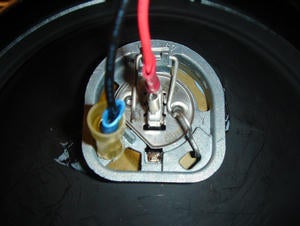
| On the back on the headlight is a male connector coming off the back of the Halogen bulb which is the positive connection. The ground connection is to a round metal post to which a female bullet connector fits over. We wired up both the positive and negative leads terminating them with male bullet connectors that would be plugged into the female connectors from the switch and regulator/rectifier. | After all connections were made we added some wire loom around the wiring to help prevent chaffing and possible shorting of the wires. The last thing you want is to be riding a few miles away from camp at night and have your light short out leaving you in complete darkness, not good! Unless you have experienced how dark it really is when your light goes out you might not take this extra precaution, but trust us it is worth the extra time to add the protective loom. |
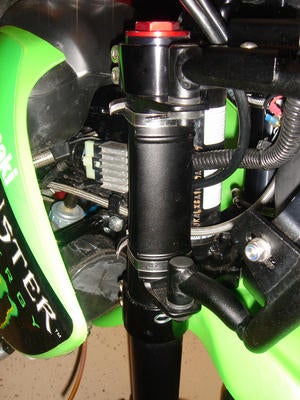 Installing the actual race light requires first mounting two “saddles” to the fork legs. These saddles are held in place with hose clamps and shouldn’t be tightened down until the light is aligned properly.
Once the saddles are aligned and tightened down the light slides into the rubber bushings on the saddles and then clips in place. The clips are easily removable so when you don’t want to run the light you just remove the four clips and unplug the light.
You don’t even have to remove the saddles, just leave them and mount the number plate over them when not running the light.
After the light is in place it is just a matter of hooking up the positive and negative bullet connectors.
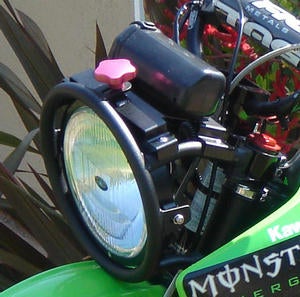
After completing the installation we reinstalled the tank, seat and shrouds and fired up the bike. Flipping the switch instantly revealed LOTS of light.
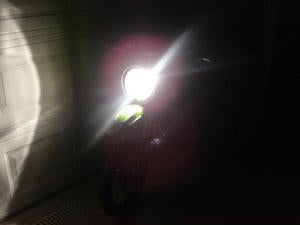 The photo and videos were taken in the driveway and don’t really come close to giving an accurate feel for how much light this thing puts out.
Once we get a chance to get the bike out on the trail at night we expect to have to make a few alignment tweaks. Luckily there is a large knob on top of the light housing that you can loosen and then move the light forward or backwards for adjusting the beam to fit your needs.
In addition to the adjustment knob you might have noticed the bonus toolbox that the previous owner of the light had installed, nice!
Check back in the near future for an update report on how the light performs on the trail.
Go to Page 3 to see video of the headlight in action
 Your Privacy Choices