Project K1500: Transmission Overhaul Part III
Final assembly of GM 4L60E Transmission
After spending some much-needed time with the professionals over at my local AAMCO Transmission shop the tranny is complete and ready to be reinstalled. I believe taking the transmission into a shop was a better option than me attempting to reassemble it by myself. If you want something done right the first time, then it’s worth spending the extra money to take it to a pro. Those guys know exactly what they are doing. I took all the parts to the shop in three different boxes and was planning on helping the tech separate the new parts from the old; but by the time I got back into the garage section of the shop the parts were already sorted out in a neat, organized fashion across his workbench. Realizing the transmission was in capable hands, I left him to do what he does best. I don’t normally like going to mechanics to get work done, but they made me feel very confident. After they completed the rebuild (in less than a week, including ordering a few new parts) I went back and picked it up. I did stop in one other time during the rebuild process to snap a few pictures of the progress.
After securing the torque converter to the tranny, ensuring it wouldn’t fall off, we loaded it up and I headed back home to begin reinstallation. Instead of bolting the transfer case to the transmission and then lifting them up as a whole, I decided to lift the transmission by itself. But before I began to put the tranny back into place I needed to reconnect all of the shift wires from the truck to the plug, which I cut off during the removal stage. Unfortunately, at the time I couldn’t figure out how to unplug it so the next best option was to cut each of the wires.
With the wires soldered and heat shrinked back together I had one last thing to do before lifting the transmission. I removed the new torque converter and primed it by pouring about 2 quarts of transmission fluid into it. Then I carefully reinstalled it onto the tranny.
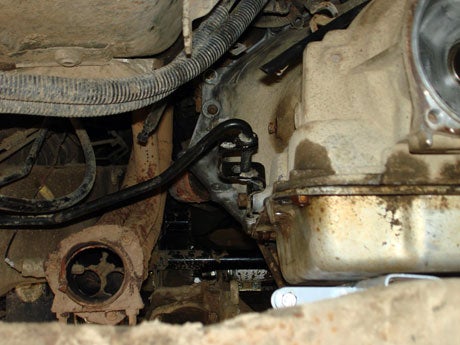
With the torque converter reinstalled and primed, and the plug reconnected I was finally ready to begin lifting the transmission back into its home. Lining the tranny back up was tedious, but not as difficult as I expected. I think this is because the transfer case is not attached.
Next I coupled the transfer case to the transmission. This was not an easy process because of the tight quarters and weight of the transfer case. I was finally successful at reconnecting the two with my brother's help. I don’t recommend trying this step unless you have a second person there to lend a hand.
Last I reconnected the front and rear drive shafts, the kicker bars (from the Superlift Suspension System, the flywheel shroud, and filled up the transfer case and transmission with oil. Thanks for reading! Sources: AAMCO Transmissions Pro-Built Automatics ProTorque |


|
Off-Road.com Newsletter Join our Weekly Newsletter to get the latest off-road news, reviews, events, and alerts! |
Follow @Off-Road
 Your Privacy Choices